
![3D Printer Maintenance [Part 2] - Preventive Maintenance](https://images.squarespace-cdn.com/content/v1/556e9677e4b099ded4a2e757/1645584056472-FFFN1QH4XQV2SCPT3SE8/Pics%2Bfor%2BBlog.jpg)
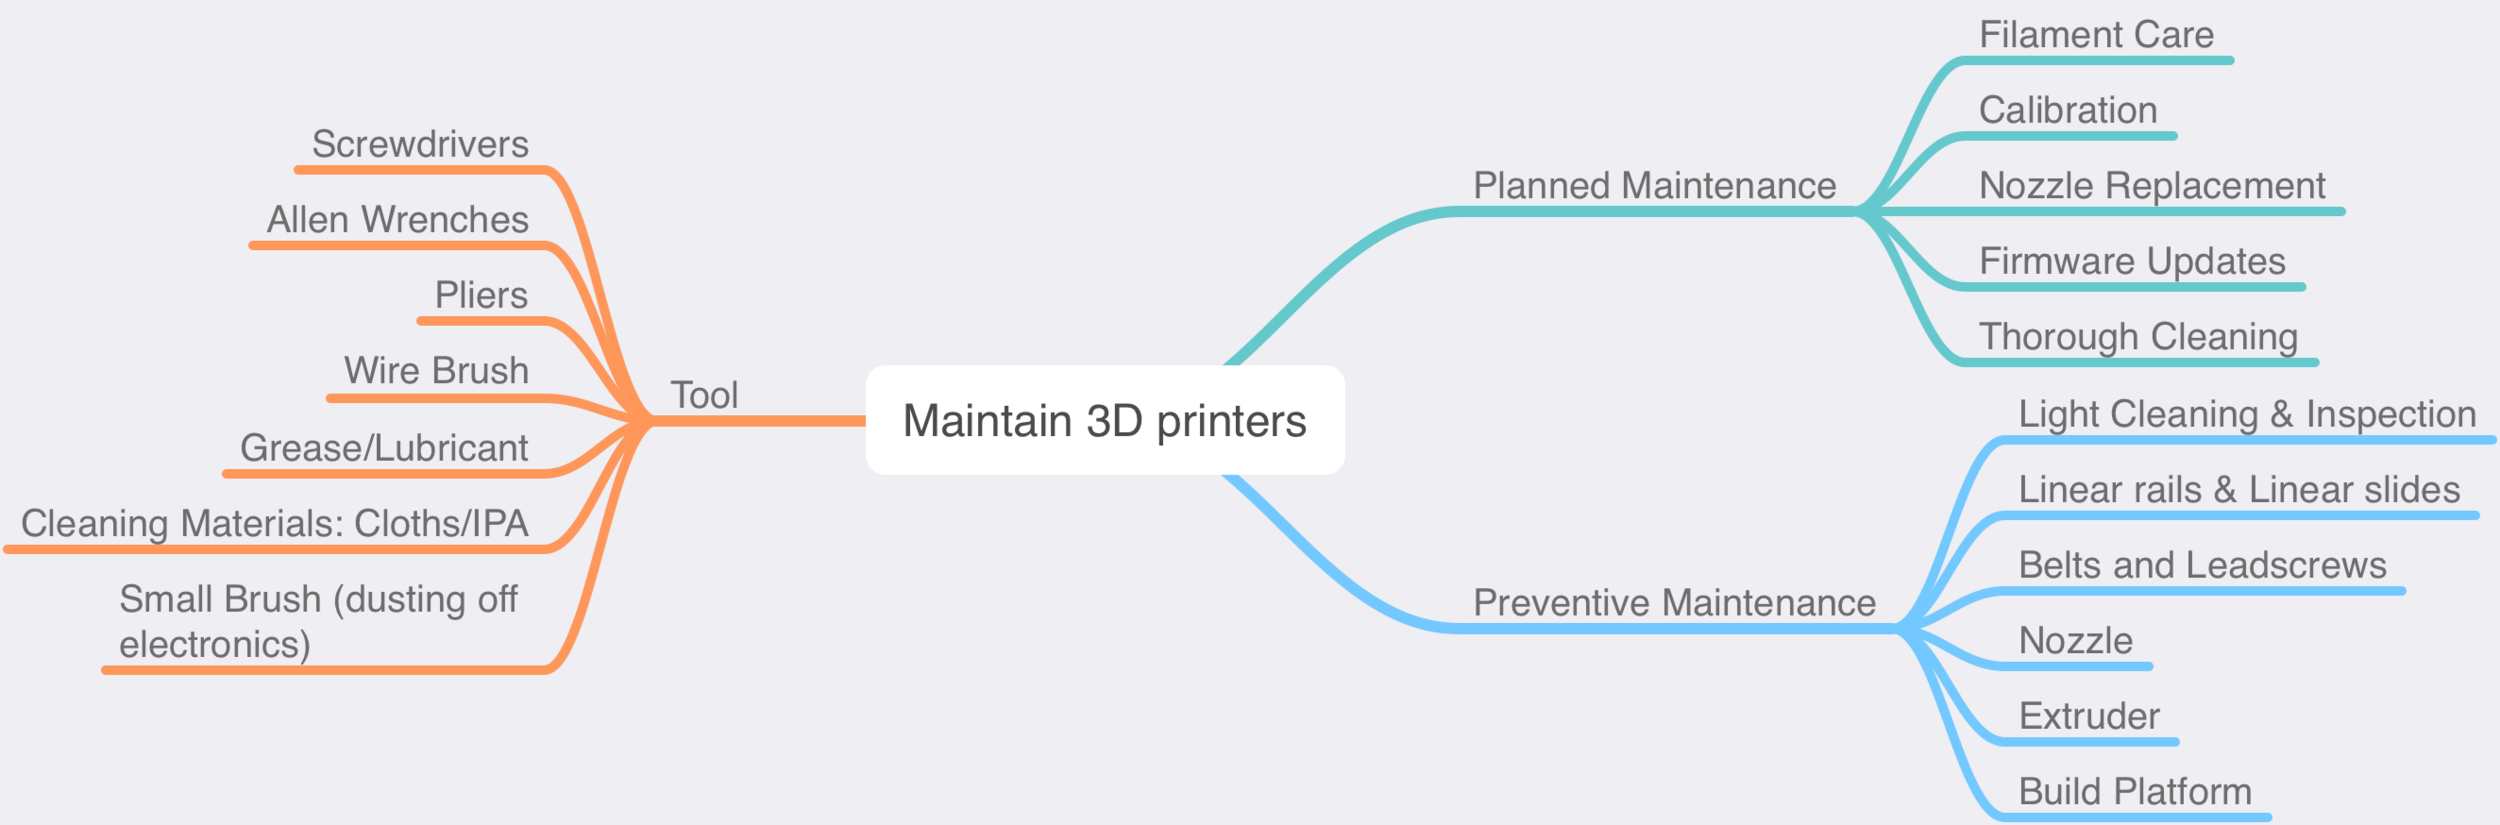
Preventive maintenance is simpler and cheaper than after the fact repairs, so it is recommended to be performed regularly to keep your printer running smoothly and reduce the chance of unexpected failures. A small amount of routine work will extend the lifespan of components, reduce the costs associated with the eventual replacement of parts that wear out and avoid downtime needed for more extensive repairs.
👉 [PART 3] - PLANNED MAINTENANCE
How often you need to perform this maintenance is dependent on how much use the printer gets and the environment in which it is kept. A printer with light use or kept in a very clean enclosure (with air filter) will require a lot less frequent attention than a printer run-flat tack in a dusty room. Keeping a close eye on when a printer's performance starts to suffer is often a good indicator it is time to get out the tool kit and take care of whatever issue may be causing the loss in printer performance.
Light Cleaning and Inspection
The best way to get started is to unplug the printer from power and place it in an open space so that it is easy to inspect each area for signs of wear, broken or missing parts, build-up of filament blobs or dust/grime. Note down any damage or tasks that will need attention as you find them, as it can be easy to forget something small if you have to deal with a few different tasks simultaneously.
Start by giving the printer a light clean while doing an initial inspection as this is a chance to pick up any issues, and it is much nicer doing any following maintenance on a clean machine. A soft brush and vacuum cleaner make fast work of any surface dust and are perfect for quickly cleaning dust and stray strands of filament from fans and the hot-end heatsink. A damp rag can also be helpful for stubborn gunk on non-electrical surfaces. Cleaning dust and grime are essential as they can build up on the printer by clogging bearings, impairing bed adhesion or blocking fans, so it is recommended to clean your printer regularly or consider keeping it in a dust-free environment.
Once the machine is clean, inspect all cables, plugs and connectors are well seated in their sockets, show no signs of damage, and no wires are coming loose. Double-check cables that carry the high current to the hot end heater cartridge and heated bed show no signs of burning, melting, or discolouration, as this is an indicator of a bad connection that may cause sparks/fires.
Linear rails and linear slides
The bearing blocks or slides on your printer must be kept clean to avoid dust getting stuck in the ball races and lubricated to allow a smooth, resistance-free motion. Start by removing any dust from the rails by wiping it off with a clean rag. Then inspect the rail for damage, bends or corrosion as these can cause significant resistance. Once clean, it is essential to relubricate the rail quickly using the recommended product (light sewing machine oil can be used if your printer did not come with its oil or a recommendation) as this will protect the rail from rust. A light film is all that is needed and can be topped up as required. Putting this task off can lead to excessive noise and resistance on the stepper motors or misalignment of layers if the friction becomes enough to cause the stepper motor to miss steps during rapid accelerations.
Belts and leadscrews
Belts and leadscrew translate the rotation from the stepper motors into linear motion of the heated bed and hot end, so any damage, resistance or play will cause poor printing performance. Check the belts are appropriately tensioned by holding the belt pulley stationary (needle nose pliers are recommended) and then lightly moving the bed or hot end with your other hand. If you can see/feel the movement of the hot end or bed, then add a little more tension to the belt before rechecking. Leadscrews can be tested similarly by holding the coupling between the stepper motor and leadscrew or the leadscrew itself and then applying a small amount of movement to that axis. Most leadscrew nuts will have a tiny whisper of play, but if you notice this amount has grown over time or is very easy to spot, it is a sign to replace the leadscrew nut for that axis.
As there are so many different types of 3d printers, it is best to check your instruction manual as to the proper tensioning method, but in case you have misplaced your manual, check out the Prusa Printers tensioning guide for an overview of the process that applies to a wide range of similar open-source printers.
Loose belt tension can lead to belt skipping, print layer shift or a loss of printer accuracy as the printer wobbles around sharp changes in direction and degrading performance the faster you print. Printers with a direct drive extruder will likely suffer more from bouncing and ringing artefacts because of the heavy mass of the extruder motor, so extra attention should be paid when checking a bowden style printer as the print defects may not be as pronounced. Too much tension will cause extra resistance and strain on the stepper motor bearings or cause overheating, so aim only to put as much tension as required to stop a light pressure when holding the pulley stationary. If you find your printer has difficulty adjusting belt tension, consider finding a suitable replacement as most open-source printers will have a wide range of aftermarket (self printable) parts available for you to choose from.
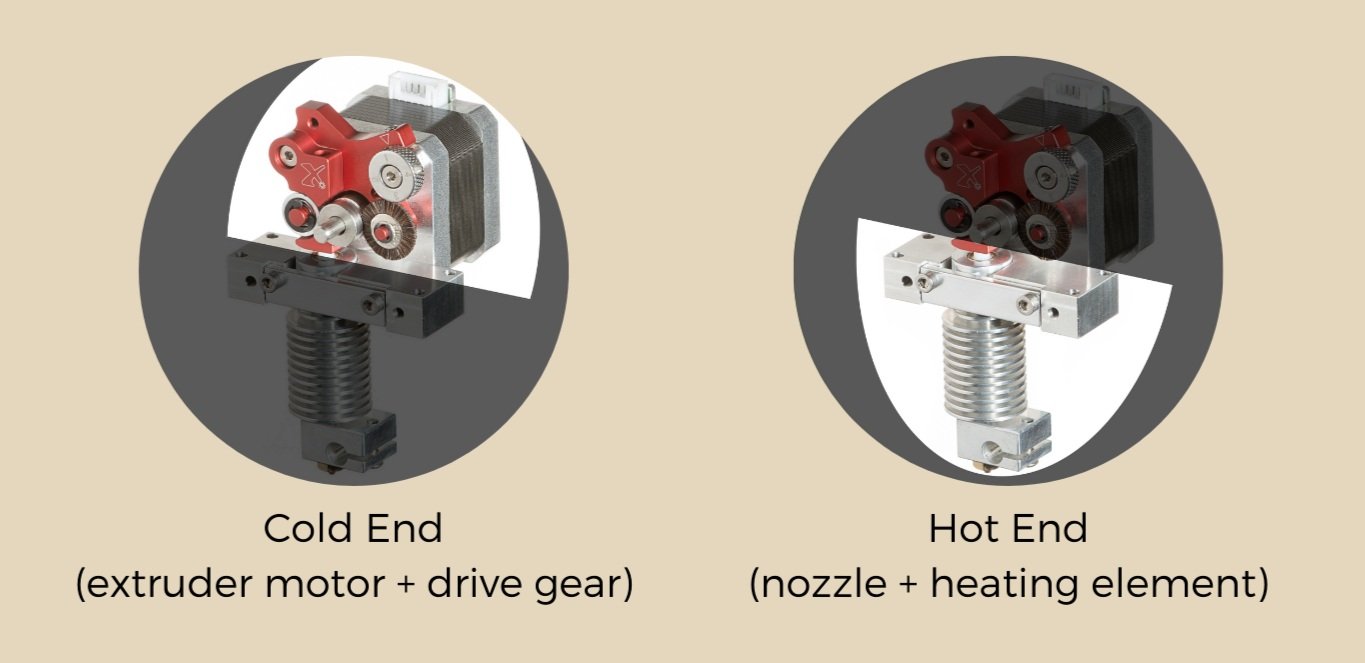
Nozzle
The nozzle of a printer is where the plastic meets the print bed, so while small in size, keeping it happy has a significant impact on print performance.
Kick things off by preheating your hot end without filament loaded (to avoid dripping) to the upper end of the temperature range of the filaments you have run in the past and allow the entire hot end to heat soak at temperature for a few minutes. Be extremely careful to avoid the heater cartridge and thermistor wiring (which is very fragile and carries 24v DC power); use a cotton rag, small brass wire brush* or ceramic tweezers to lightly brush away any external melted plastic from your hot end heater block and nozzle. The hot molten plastic should lightly stick to the brush or cloth and is easy to make the heater block area look new again.
A small brass wire brush is the most effective tool for the job but being conductive poses a risk of shorting out the heater cartridge or breaking the very fine thermistor wires if care is not taken. The safest method is to turn the heater off via the LCD menu before brushing to avoid power on the heater cartridge wires when using a wire brush. Turning the printer entirely off is another option, but as soon as you finish, turn the printer on again as most require the hot-end heatsink fan to run any time the nozzle is above 50c. You may need to reheat the heater block if it cools too much while cleaning, but this should be quite fast and is still much quicker than replacing a heater cartridge or a printer's mainboard!
If this is a common problem for you, consider getting a silicone sock for your hot end as they are cheap and give a slight thermal stability bonus and make cleaning far simpler as you can remove the sock while cold and then flick off any stray filament.
Now that the outside is clean, I recommend using, as demonstrated by the Youtube 3d printing godfather, Thomas Sanladerer, the cold pull method as an efficient internal cleaning method that is less likely to ream out or damage the very fine hole at the tip of the nozzle. A fine pin and some careful poking can also work, but it is very easy to damage the nozzle unless you are incredibly careful.
If you don't keep the inside of the nozzle and melt zone clean, your printer is likely to suffer under extrusion, partial or complete blockages and reduce retract performance, which increases the chances of blobs on your print surface. Keeping the outside of the hot end clean will help you avoid bits of old filament dripping onto your current print, but also small flyaways have a nasty habit of catching the first few layers and pulling them up, causing a print to fail, so keeping it clean is well worth the effort.
Extruder
Extruders use a drive gear to grip the filament and push it down into the hot end. Regular use can build up an accumulation of ground filament particles that can clog the drive gear teeth and reduce the grip causing under extrusion or filament slip. Refer to your user manual about how to get into the drive gear area. A small clean paintbrush and vacuum cleaner can often make short work of any build-up. A toothpick is a helpful tool to scrape any clogged drive gear teeth clean without risking damage to the surface of the gear.
While this list may seem a little daunting at first glance, a little bit of practice becomes very manageable and rewarding as you will gain a deeper understanding of how your printer works. More importantly, you will gain the confidence to know your printer is in peak performance and can be a trusted tool to help students explore their creativity and become confident with the joys of rapid prototyping within the classroom.
Build Platform
The first layer of a print is arguably the most important; it sets the base for every layer that will come after it. A perfect first layer will give the best print results as you avoid elephant footing and with good adhesion, the prints will stay locked onto the build platform during the entire printing process, so it is worth spending some time to get the printer bed dialled in.
Start by deep cleaning the print surface to remove any contamination or product build-up as it only takes a tiny amount of contamination, dust or oil from fingerprints to cause bed adhesion to suffer. Removable print surfaces (spring steel, G10, glass etc.) make this task easy as it is possible to soak the removed surface in hot soapy water to soften any glue stick or products, then rinse clean with fresh water and allow to drip dry. If your bed is not removable, then using a paper towel or rag laid on the printer bed then dripping a small amount of water to dampen it will give you a similar effect soaking effect with less chance of dripping but for safety, always unplug your printer as a spill could end in disaster.
Once clean, it is worth checking your bed surface is in tram with the motion system by moving the print head close to the print surface and using a piece of paper as a feeler gauge to note the relative Z height in the middle of the printer surface and then each corner. With these measurements, it is easy to see if you should use the bed levelling adjustment screws to tram the print bed to the movement of the printer as it is best practice to set the bed as physically flat and trammed before allowing the software-based mesh bed levelling, that most modern printers come with, to make the last smaller software base adjustment.
Once your bed is clean and trammed, then it is ready to set your first layer height using either test prints or, if available, the built-in calibration function that allows you to adjust the Z height on the fly while printing a long single line that zigzags its way across the print bed.
As it is likely you may have touched your bed during calibration or removing the last print; it is a good habit to wipe the bed down with the recommended cleaner (solvents can break down some print surfaces, so always check with your user manual) before each print using a clean lint-free cloth.