
![3D Printer Maintenance [Part 3] - Planned Maintenance](https://images.squarespace-cdn.com/content/v1/556e9677e4b099ded4a2e757/1645662992531-0H56N3WE7VEKJML26X1E/Pics+for+Blog+3.png)
While regular preventive maintenance will help keep your printer running smoothly, there are some extra tasks you can carry out once or twice a year to further enhance your printer's performance.
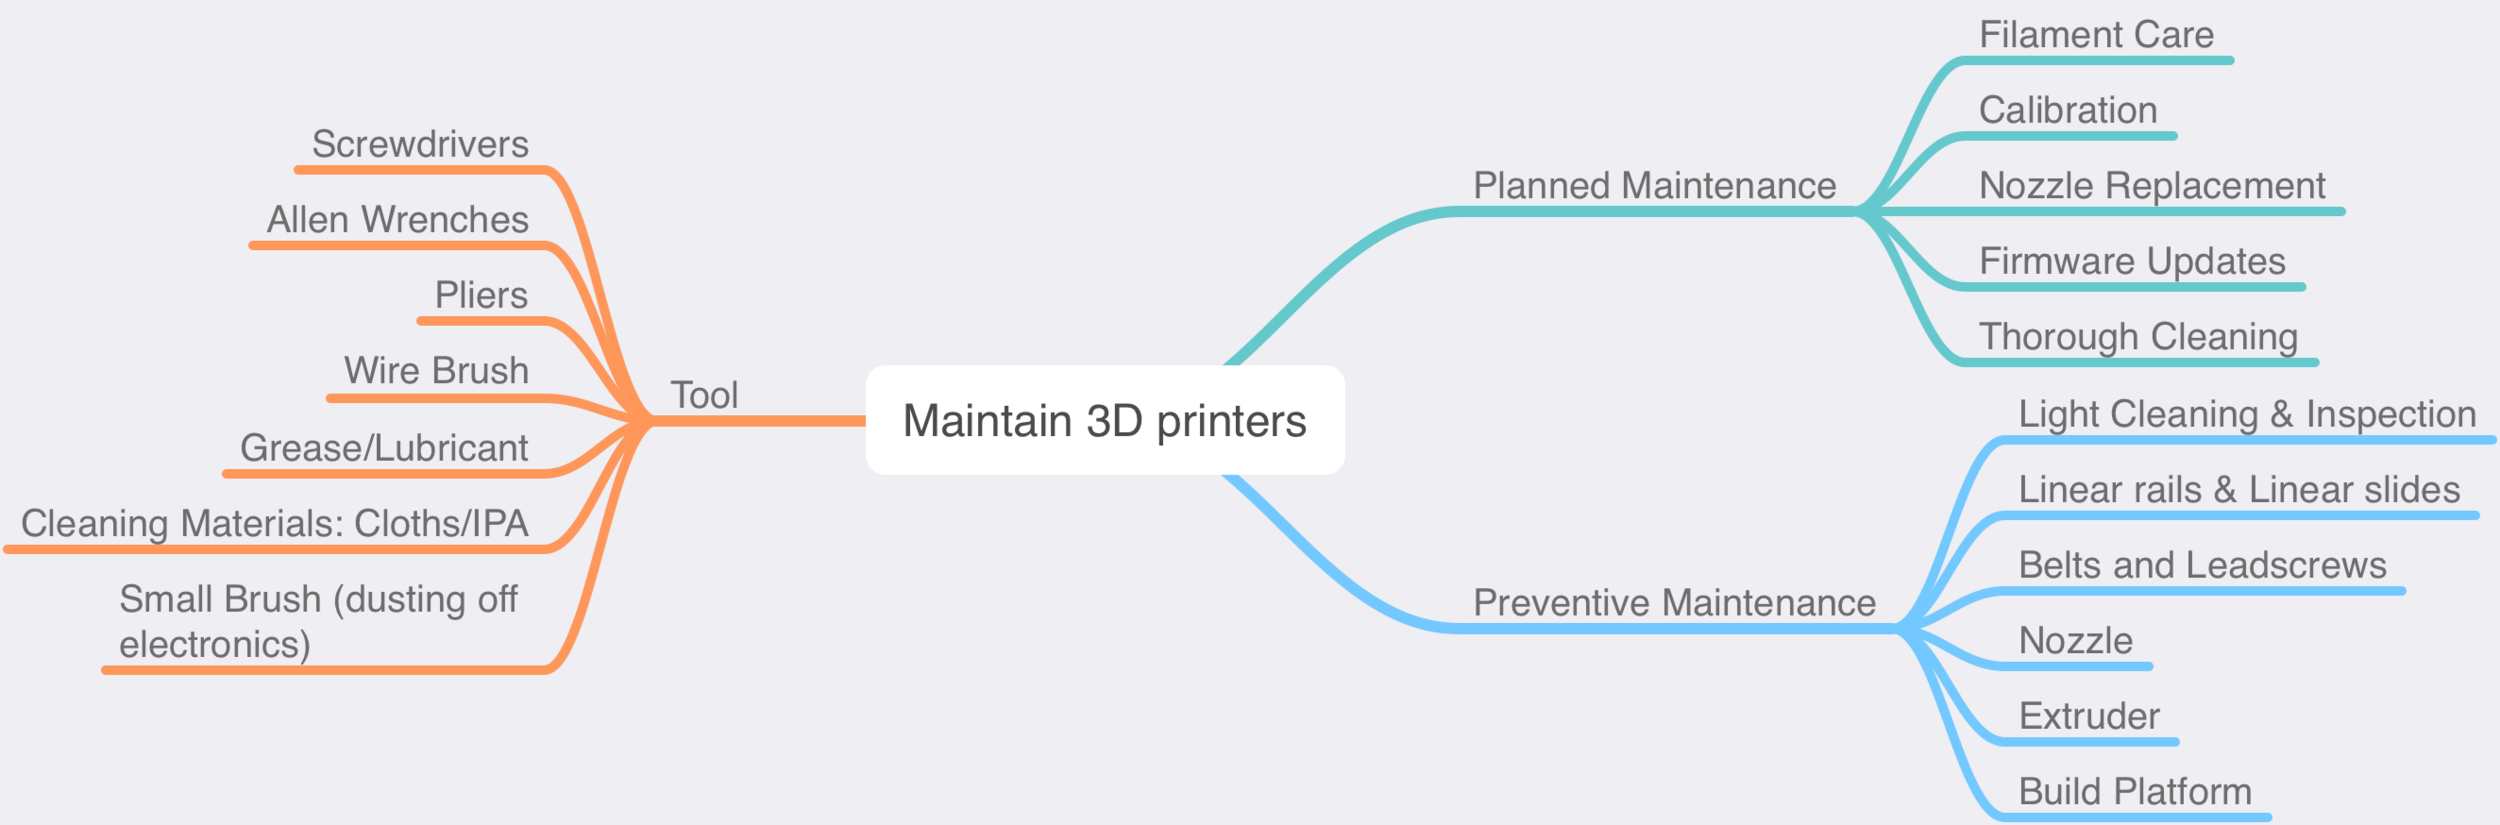
Filament Care
Dust is the natural-born enemy of the 3d printer nozzle, as it only takes a small amount to cause a partial or total blockage and dust can also build up and cause unwanted friction in the bowden tubes. Check your clip-on dust filters as the foam should be cleaned or replaced if it has worn out. If you are not yet using clip-on dust filters, check out this print model by Haprog that is fast to print and a simple way to wipe the filament as it enters your extruder. While it is tempting to think this item can act as an oiler, please refrain as Stefan Hermann has tested oiling and found it overall a disadvantage.
If your printer is in a damp environment and you notice the filament bubbles when printing (absorbed moisture boiling out when heated), build a dry box from a cheap airtight food storage container as a practical way to keep your filament dry. This dry box has the added benefit of protecting the filament from dust and will prolong the shelf life of the filament once removed from its vacuum-sealed packaging.
Calibration
A well-maintained printer should hold its calibration for a long time, but it is wise to print a 3D Benchy or calibration cube and confirm that the size and quality are expected. I recommend dating this calibration part and keeping it as a reference to check the quality is staying stable over time. If you print a 3D Benchy, check for print quality, accuracy, cleanliness, and the other characteristics described on their official website, as the model has lots of features to test the performance of your printer.
If your printer calibration has started to drift, then either follow your manufacturer instructions or the following guides can help with a general calibration process, including correctly setting the extruder’s steps per millimetre.
Nozzle Replacement
While it may be hard to believe, the constant rubbing of filament inside the nozzle tip will open up this precision hole and deform its shape, making it hard for the printer to hold the same tolerances as when new. Harden steel nozzles or ruby tipped nozzles that do not suffer erosion are aimed at printing extremely abrasive (carbon or metal filled) filaments and are not worth the extra cost for standard printing. A far more cost-effective option is to plan to change the nozzle 1-2 times a year with heavy use as when purchased in a muli-pack.
Please check your user manual for the correct nozzle changing method for your printer, but here is a link to swap out a nozzle on an E3D V6 style hot end (one of the most common). Be careful during this process as the heater block will be hot, and much like cleaning, care must be taken to avoid damaging or touching the heater cartridge and thermistor wires.
Firmware Updates
Many modern 3d printers are open-source and have HUGE communities of users updating, upgrading and modernising the slicer and firmware that drives your 3d printer. It is a good habit to know what version of firmware your printer runs, as keeping it current will keep your printer at the cutting edge of functionality and address any safety issues the community has identified. Care must be taken when updating the firmware, as it is possible to wipe important information. Hence, it is always best to follow the manufacturers' recommendation for the firmware install method and version. This process is very quick and can often unlock new functions as the community moves forward together.
Thorough Cleaning
While keeping the printer clean and dust-free is a good rule of thumb, once or twice a year, you should aim to dive deeper and remove the dust and the unavoidable build-up of small bits of filament in the harder to reach areas. Check that the electrical control board is dust free as a thin coating can hide heat dissipation and encourage corrosion of contacts and the PCB. As print and hot end fans are critical for print performance, take the time to fully disassemble them, as they can build up internal dust or layers of very fine filament that is sucked in during everyday printing. A little effort to keep them clean will prolong their lives and avoid a fan failing or unexpectedly stopping mid-print. A set of new and clean paintbrushes are an excellent tool for this job, but having a vacuum at hand will help remove the dust rather than just pushing it around.
Now that you have finished these tasks, your printer should be in top-notch shape and have the best chance of becoming the easy to use and reliable machine. If, by any chance, something goes south during your test prints, this is the time to troubleshoot. However, this is unlikely to happen as you have now completed the OMGtech! 3D printer guide and, as such, should have a fantastic tuned and reliable 3D printer freshly serviced and reliable printer that you can trust to help your students engage technology to explore their creativity.